⦁ Export a corridor to a solids drawing.
⦁ Link the solids drawing to 3D Studio Max for UV Mapping.
⦁ Export the 3D Studio Max to an FBX file format.
⦁ I will use Epic’s Twinmotion software for this exercise.
Civil 3D Assembly and Corridor.
1. Select the corridor object.
2. Click Extract Corridor Solids on the Corridor Tools panel of the ribbon.
3. Click Next and then Next again.
4. Choose the Output Object Type. I've selected AutoCAD 3D Solid (swept solids).
5. Click the Add to a new drawing radio button.
6. Name the file and save it to the project folder.
7. Click the Extract Solids button.
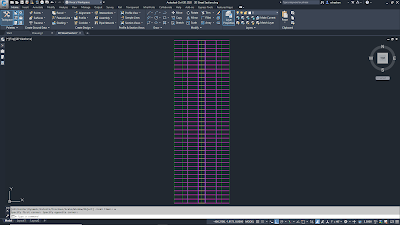
The Exported Solids Drawing
I have added an underground solid then added underground utility pipes and duct banks using various AutoCAD 3D Solid tools. See my Autodesk University 2019 class on 3D modeling with AutoCAD.
There are a few paths you can go from here. Stay in 3D Studio Max for final rendering or export the model into another software. I'm going to export the model into Twinmotion so I'm only using 3D Studio Max for UVW Mapping, basic materials and exporting the model to an FBX format.
2. Link the 3D Street Section Solids.dwg drawing to the scene.
1. Set Curve Steps to 100.
2. Set Maximum surface deviation for 3D solids to 0.01.
3. Check Use scene material definitions.
4. Check Use scene material assignments on Reload.
5. Click OK.
Assigning Material and a UVW Map modifier to each object.
1. Select an object such as the pavement.
2. Click the Modifier List pull down on the right then select UVW Map.
3. Set the Mapping to Box.
4. Change the Length, Width and Height to 1.0'
5. Repeat for each object. Ground, curb, utility pipes and so on.
6. Add materials to the objects.
7. Press M on the keyboard to open the Materials Editor.
8. Click Modes on the upper left then select Compact Material Editor. Use Slate Material Editor if you like.
9. Right click on a Sample Window sphere.
10. Click 6 X 4 Sample Windows.
11. Click Get Material.
12. Double Click the Standard (Legacy).
13. Name the material such as Curb.
14. Drag the newly created material to the next Sample Window.
15. Rename the material to Asphalt.
16. Repeat steps 14 through15 for each object type in the scene. (Ex. Grass, Sidewalk, Dirt, Gravel and so on).
Adding a UVW Map modifier to each object.
1. Select an object such as the pavement.
2. Click the Modify button on Command Panel to the right.3. Click the Modifier List pull down list then select UVW Map.
4. Once the Modifier is added to the object, click the Box Mapper.
5. Set the Length, Width and Height to 1.0'.
6. Repeat steps 1 through 5 for each object type in the scene.
Export the model to an FBX file format.
2. Click File> Export> Export Selected...
3. Save the file to the project folder as Street Section.fbx.
FBX export options.
2. Check Embed Media
3. Uncheck Animation, Light, Cameras
4. Click the OK button.
5. Click OK on any Warnings and Errors.
Launch Epic's Twinmotion
Epic's Twinmotion download link.
https://www.unrealengine.com/en-US/twinmotion
Importing 3D models into Twinmotion.
1. Save the Twinmotion file to the project folder as Street Section.TM.
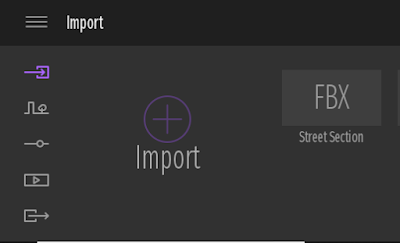
2. Click the Import button on the lower left.
3. Select the Street Section.fbx from the project folder.
4. Once imported, drag the Street Section.fbx into the scene.
5. Expand the object list in the upper right.
6. Select the Street Section.fbx then hit F on the keyboard. This will zoom to the model.
7. Select the default tan paver object then delete it.
8. Expand the Material and Asset browser list in the upper left.
9. Browse Materials for grass. (Materials> Ground> Nature)10. Drag the Grass 1 material to the median of the street section.
11. Browse Materials for asphalt. (Materials> Ground> Manmade)
12. Drag the Asphalt 1 material to the median of the street section.
13. Repeat steps 9 through 12 for adding additional materials to the objects.
15. Repeat step 14 for adding additional assets to the scene.
16. Import other desired 3D objects from Revit, SketchUp and so on.
Setting up still and animation renderings.
1. Once the model is setup to your liking, click the Media button on the lower left to setup images and video renderings.
16. Import other desired 3D objects from Revit, SketchUp and so on.
Setting up still and animation renderings.
1. Once the model is setup to your liking, click the Media button on the lower left to setup images and video renderings.
2. To setup still renderings, pan to the desired position.
3. Click Image >.
4. Click the Create image button to create an image snapshot.
5. Repeat steps 18 through 20 for addition renderings. (Image settings such as image size, visual effects, weather can be changed under the more button)
6. To setup a fly through animation, pan to the desired starting position.
7. Click Video >.
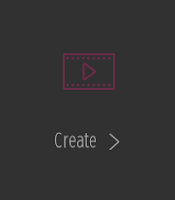
8. Click Create >.
9. Click Create clip.
10. Pan to the next animation point.
11. Click the + symbol to the right of the clip.
12. Repeat steps 10 through 11 for additional fly through points. (Video settings such as resolution, visual effects, weather can be changed under the more button)
Rendering the still images and fly through animation.
1.Once the still images and animation is setup to your liking, click the Export button on the lower left to export the images and video renderings.
2. Click Image and or Video then select the media to export.
3. Click Start Export.
4. Select the folder to save the media.
Enjoy the renderings and animations.


