Showing posts with label 3D Printing. Show all posts

Sunday, February 15, 2026

Python on a Raspberry Pi Pico (Update)

 Here is an update to my Raspberry Pi Pico project. I setup the Python code to connect the Pico to Wi-Fi then grab date and time from an NTP (Network Time Protocol) server. I have it displaying the date and time on the first row. On the second row, it is displaying the temperature and humidity from a sensor connected to the Pico. I put it all together in a modular bracket I drew and 3D printed for my network rack. I used Thonny to write and Python with assistance from ChatGPT as I'm still learning how to write Python. The code to this project is below the images.

Hardware for this project is.
Raspberry Pi Pico 2W.
The screen model is the I2C LCD 1602.
The temperature and humidity sensor is the DHT-11 module.

You'll need to download the drivers for the screen.


Here is the Pyhton code this project.

from machine import Pin
from time import sleep_ms
import dht
import network
import secrets
import socket
import time
import struct
import I2C_LCD_driver

sensor = dht.DHT11(Pin(15))
lcd = I2C_LCD_driver.lcd()

from machine import Pin

NTP_DELTA = 2208988800
host = "pool.ntp.org"

led = Pin("LED", Pin.OUT)

def set_time():
    NTP_QUERY = bytearray(48)
    NTP_QUERY[0] = 0x1B
    addr = socket.getaddrinfo(host, 123)[0][-1]
    s = socket.socket(socket.AF_INET, socket.SOCK_DGRAM)
    try:
        s.settimeout(1)
        res = s.sendto(NTP_QUERY, addr)
        msg = s.recv(48)
    finally:
        s.close()
    val = struct.unpack("!I", msg[40:44])[0]
    t = val - NTP_DELTA
    UTC_OFFSET = -5   # <-- your timezone here
    t = t + int(UTC_OFFSET * 3600)
    tm = time.gmtime(t)
    machine.RTC().datetime((tm[0], tm[1], tm[2], tm[6] + 1, tm[3], tm[4], tm[5], 0))


# ---- WiFi Setup ----
wlan = network.WLAN(network.STA_IF)
wlan.active(True)
wlan.connect(secrets.secrets['ssid'], secrets.secrets['password'])

max_wait = 10
while max_wait > 0:
    if wlan.status() < 0 or wlan.status() >= 3:
        break
    max_wait -= 1
    print('waiting for connection...')
    time.sleep(1)

if wlan.status() != 3:
    raise RuntimeError('network connection failed')
else:
    print('connected')
    status = wlan.ifconfig()
    print( 'ip = ' + status[0] )

led.on()
set_time()
print(time.localtime())
led.off()


def display_time():
    while True:
        tm = time.localtime()
        year   = tm[0]
        month  = tm[1]
        day    = tm[2]
        hour   = tm[3]
        minute = tm[4]

        # Convert to 12-hour format without leading zero
        if hour == 0 or hour == 12:
            display_hour = 12
        else:
            display_hour = hour % 12

        # Format date as MM/DD/YY
        date_str = "{:02d}/{:02d}/{:02d}".format(month, day, year % 100)
        # Format time as H:MM (no leading zero on hour)
        time_str = "{}:{:02d}".format(display_hour, minute)

        # Combine date and time with single space
        row1 = "{}   {}".format(date_str, time_str)[:16]

        # Display on first row
        lcd.lcd_display_string(row1, 1)
        
        # Reading Temp and Humidity
        sensor.measure()
        tempF = round(((sensor.temperature() * 1.8) + 32), 0)
        humid = sensor.humidity()
        
        # Display on second row
        line = "TMP:{:.0f}F HUM:{:.0f}%".format(tempF, humid)
        lcd.lcd_display_string(line, 2)
        sleep_ms(2500)
        
        time.sleep(1)

display_time()


 I also created a Python file that stores my WiFi credentials called secrets.py. You can see the reference in the code below.

# Save this as settings.toml in the root directory
CIRCUITPY_WIFI_SSID="Your_WiFi_Name"
CIRCUITPY_WIFI_PASSWORD="Your_Password"

Sunday, February 8, 2026

Python on a Raspberry Pi Pico

As I'm learning Python and Micropython to ultimately write code for Dynamo for AutoCAD and Civil 3D, I'm playing with some basics. Writing Micropython for a Raspberry Pi Pico to read temperature and humidity then display the readings on a 16x2 LCD screen. My plan is to mount the setup in my network home lab to see the temperature inside the cabinet. I will 3D model and 3D print a mounting bracket for screen and Pico. Cool things to come.


Wednesday, August 27, 2025

Bambu Lab - Maker World!

 Head over the Bambu Lab Maker World site to see and 3D print some of my 3D models. There are tons of other cool models from creators around the world.

Monday, August 4, 2025

Raspberry Pi - Cyberdeck

 This was a fun personal project. I created a 3D printed case for a Raspberry Pi 5 and a 7” Raspberry Pi Touch Display 2 screen. The case was modeled in AutoCAD using solids and 3D printed on my Bambu Lab X1 Carbon printer. The back panel was modeled with keystone inserts so I can use various keystone jacks for the rear I/O. The rear I/O consists of ethernet, USB and HDMI. I currently have a 3D Printed mouse in matching colors and a small keyboard. My plans are to use it for motoring my Unifi home network lab, home automation and media streaming box. I also plan to create a miniature stop light setup and controller using Python and Scratch. Learning Python should be fun. Enjoy!


Saturday, December 28, 2024

Bambu Lab Maker World

 Here is a link to my 3D models on the Bambu Lab Maker World site.

https://makerworld.com/en/@vsheehan

Monday, December 23, 2024

3D Modeling in AutoCAD for 3D Printing

 Here is a short tutorial on 3D printing AutoCAD 3D models.


Tuesday, December 12, 2023

Christmas Ornaments

 I'm drawing and 3D printing Christmas ornaments. They were modeled in Autodesk AutoCAD and Fusion 360. I used the 0.2mm and 0.4mm hotend assemblies on my Bambu Lab X1 Carbon for printing.


Thursday, June 29, 2023

Autodesk University 2023 3D Printed Chip

 I created an Autodesk University chip I plan to hand out during the week of AU. I used AutoCAD solids to create the model. As for the QR code, I converted the QR code image to DXF and cleaned it up in AutoCAD. I tested the QR code with my smartphone while in AutoCAD and then in the Bambu Lab Studio slicer software. It worked so now to 3D print the model and test the QR code. I used Numakers PLA filament in three colors. The QR code works but I feel it can be improved. More to come!


Here are a few updated 3D prints. I used a 0.2 mm print nozzle for better accuracy. The downfall, it took twice as long to print compared to using the 0.4mm print nozzle.


Wednesday, June 14, 2023

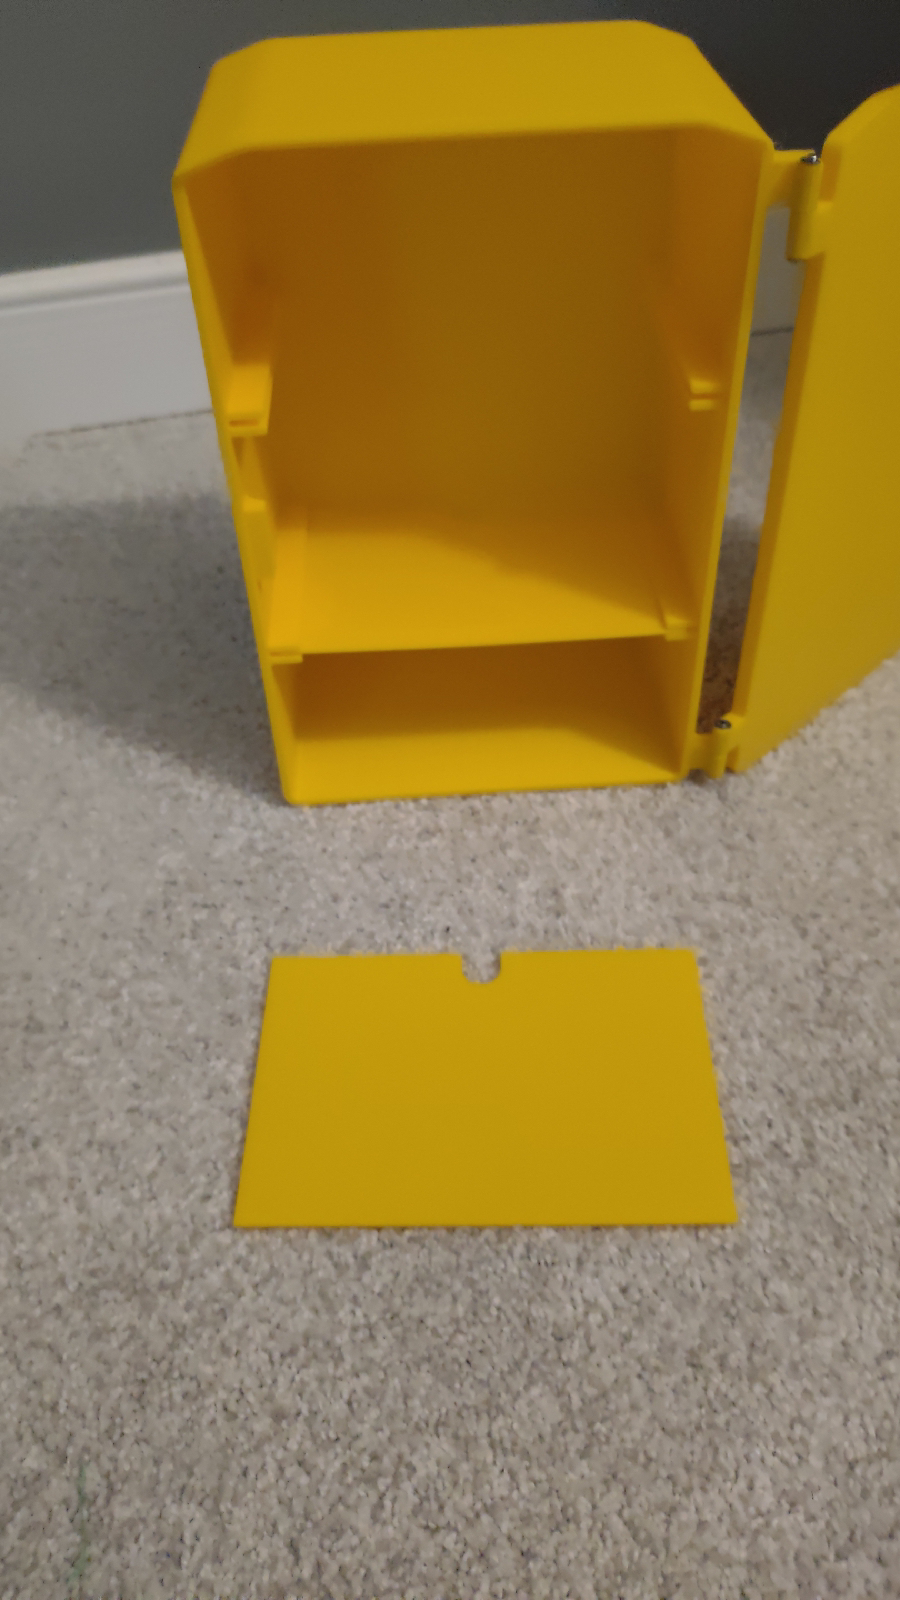
3D Printed Miniature Traffic Control Box

I created a miniature traffic control box for a co-worker who is into miniature LED stop lights. The box will house the electronic controllers for the LED stop lights. The model was created in AutoCAD 2024 with 3D Solids then exported to a stereolithography (STL) file for slicing in the Bambu Lab software. I used yellow Numakers PLA+ filament. Total print time was around 14.5 hours. I had to make a few adjustments to the print speed and temperature to use the Numakers PLA+ filament.